
A handmade tree looks finished when the ornaments do not all come from the same felt circle or the same wrapped bauble.
These twelve felt and fabric Christmas ornaments are built as different structures — an accordion felt ball, a cut-away window, a no-sew donut, a candy cane, a fabric finial — so a change of color is not counted as a new project.
Each idea comes from an original tutorial, with the materials, the key method, and a link back to the full how-to. Sewing and no-sew projects are labeled as the creator actually works them. Safety notes are included where buttons, beads, needles, a hot glue gun, or a drill are part of the method.
Choose the Method First
The Method. Some of these ornaments are no-sew. Others need a running stitch, a sewing machine, or a barbed felting needle. The label on each project is the method the original tutorial uses, not a shortcut version of the same idea in a new color.
Match the Material to the Structure
The Material. Wool felt holds a cut edge and a stitched seam. Cotton scraps sew into a smoother bauble than bulky knits. Loose wool roving is what you want for needle felting, not a sheet of craft felt.
Keep Small Parts and Sharp Tools in Adult Hands
The Safety. Buttons, beads, sequins, wood caps, barbed felting needles, and a hot glue gun do not belong in a toddler’s reach. A drill and a saw are adult tools. None of these projects is presented as a toy, and none is automatically safe for young children.
Hang for the Shape, Not in a Matching Row
The Display. Soft balls and stacked trees need a little air around them. Flat gingerbread figures and hooped or stuffed stars read best where the stitching can be seen. Mix no-sew pieces with sewn felt so a handmade tree does not look like one idea repeated.
1. Accordion Felt Ornament Balls
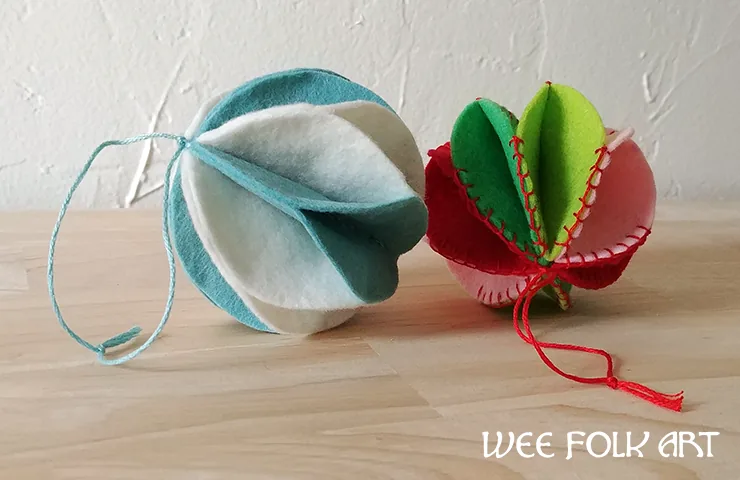
Tutorial: Michelle, Wee Folk Art
This ball is made from eight felt circles sewn along their creases, then opened into a honeycomb, or accordion, shape. In the photo, one finished ornament is light blue and white with a simple glued edge; the other is red, pink, and green, finished with a red blanket stitch — two options from the same Wee Folk Art tutorial.
Method: Hand sewing, with an optional glue finish on the pleats.
What you need: Wool felt, matching embroidery floss, a needle, scissors, a jar lid or similar circle to trace, and optional craft glue. The tutorial uses a warm iron to set the creases on wool felt; skip or test that step on acrylic felt, which can be damaged by heat.
Display tip: Hang a pair in mixed colors so the pleated structure can be seen from the side, not flattened against the trunk.
2. Cut-Away Window Felt Baubles
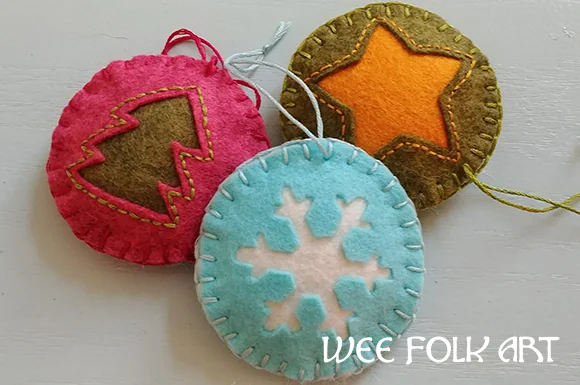
Tutorial: Michelle, Wee Folk Art
A cut-away window ornament is two felt circles with a small shape cut from the front so a second color, or a tiny scene, shows through. Michelle’s Wee Folk Art tutorial uses felt, a blanket stitch around the outer edge, an optional backstitch around the window shape, and a little glue where the window needs to stay put. The result is a thin, lightly padded bauble, not a solid stuffed ball and not the accordion felt ball above.
Choose a felt firm enough to keep a crisp window edge — wool felt usually cuts cleaner than a floppy acrylic. Stars, trees, and simple diamonds all work as the opening if you keep the cut well inside the stitched margin. Hang these where a bit of light can reach the window, halfway up the tree rather than pressed against the trunk.
Method: Hand sewing, with glue at the window.
What you need: Felt in at least two colors, scissors, needle, thread, a little stuffing or batting, and glue.
Safety note: Use sharp scissors and a needle with care; this is not a first sewing project for a very young child.
3. Stacked Felt Disk Trees
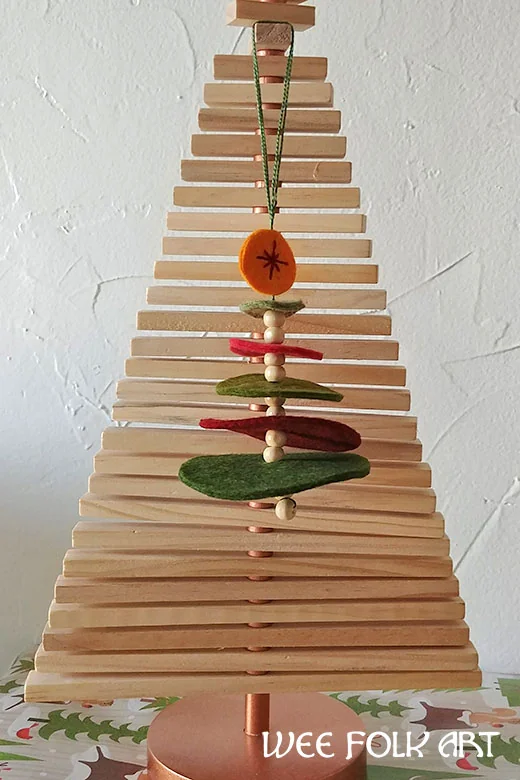
Tutorial: Michelle, Wee Folk Art
This tree is a stack of graduated felt disks on a floss or string core, not a sewn flat silhouette and not the window bauble from the same maker. Michelle’s second Wee Folk Art tutorial builds the shape with wool felt circles, wood beads, and glue. Embroidery is optional, so the project stays no-sew if you stop at glue and beads.
Use a felt that will not crush when the disks are stacked, and keep the circles clearly stepped in size so the tree reads from across the room. The wood beads act as spacers and a hanging top, but they are small parts. Keep finished trees away from babies and toddlers, and do not treat them as toys. A few trees of slightly different heights look better than a perfectly matched row.
Method: No-sew (glue and beads; embroidery optional).
What you need: Wool felt, wood beads, embroidery floss or string, glue, and scissors. A pattern for the circle sizes is on the original post; use it there, and do not copy or republish it.
Safety note: Wood beads are a choking hazard.
4. No-Sew Felt Donut Ornaments
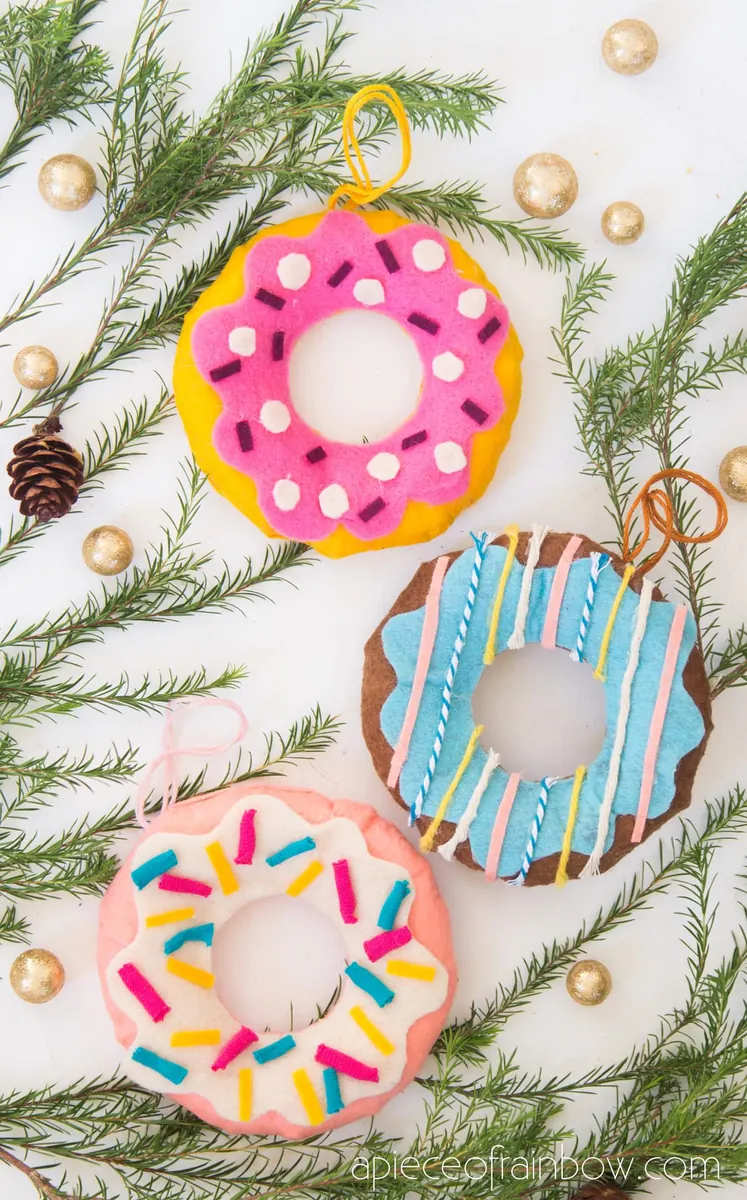
Tutorial: Ananda, A Piece of Rainbow
These ornaments are stuffed felt rings with a felt “glaze” and yarn or felt sprinkles, not sewn cookies and not the stacked disk tree above. Ananda’s tutorial builds them with a hot glue gun: two donut-shaped felt layers are glued at the outer edge, turned, stuffed with polyfill, and closed at the inner ring before the toppings go on.
Method: No-sew (hot glue).
What you need: Craft felt in several colors, polyfill, a hot glue gun and glue sticks, a marking pen, scissors, and twine, yarn, or pompoms for sprinkles. A round lid about four inches across can be used as a tracing guide.
Safety note: A hot glue gun and fresh glue can burn; keep fingers clear of the tip. This is not a first project for a very young child unless an adult handles the glue.
Hang a small cluster of mixed “flavors” together so the sprinkles can be seen — a playful felt and fabric Christmas ornament among flatter sewn pieces.
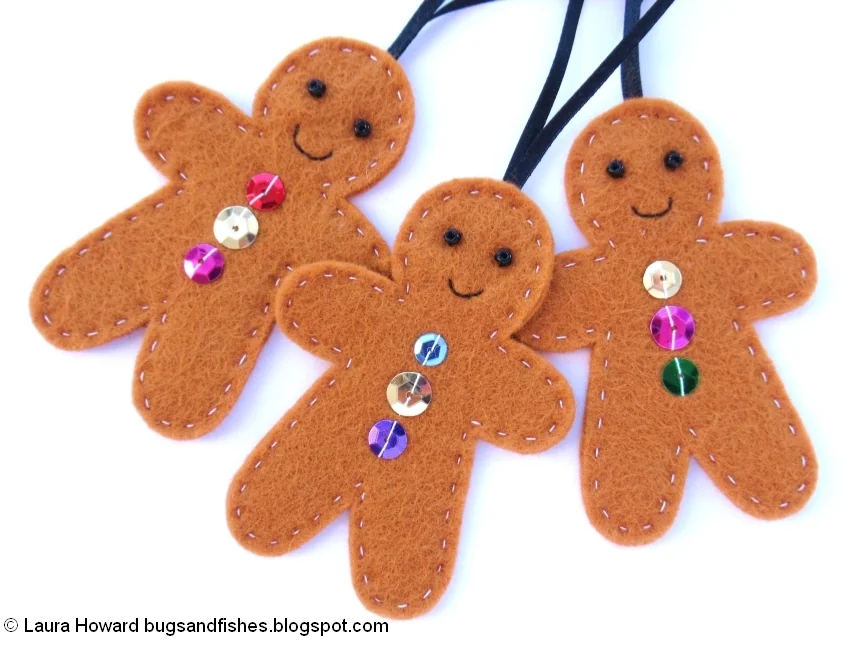
5. Flat Felt Gingerbread Figures
Tutorial: Lupin, Bugs and Fishes
These gingerbread figures are two felt layers joined with a visible running stitch and left unstuffed, so they stay flat on a branch. Lupin’s Bugs and Fishes tutorial includes a simple template for personal, non-commercial use — follow it from the original post, and do not copy or republish the template or the full how-to. Embroidery, beads, or sequins can add icing-like details if you want them.
A medium-brown wool-blend felt reads as gingerbread without paint. If you add beads or sequins, stitch them down firmly; they are small parts and a poor choice for a tree within a toddler’s reach. Hang the figures where the running-stitch outline can be seen, rather than pressed against denser ornaments.
Method: Hand sewing.
What you need: Felt, sewing thread, a needle, ribbon for hanging, and the author’s template. Beads or sequins are optional.
Safety note: Beads and sequins are choking hazards.
6. Sewn Felt Christmas Tree Ornaments
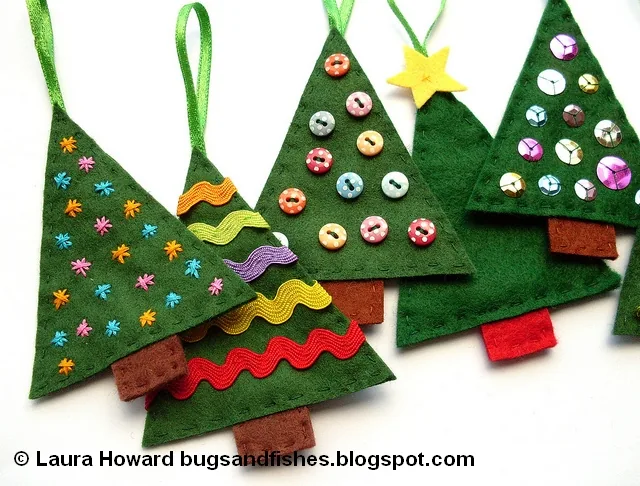
Tutorial: Lupin, Bugs and Fishes
These are flat, sewn tree silhouettes — two green tree shapes and a small trunk, stitched around the edge — not the stacked disk trees earlier in this list. In Lupin’s photo, a row of finished trees shows different decorations: embroidered stars, ricrac waves, mini buttons, sequins, or a felt star on top. The tutorial is for personal, non-commercial making; use her templates from the original post, and do not republish them.
Method: Hand sewing.
What you need: Dark green felt, brown or red felt for the trunk, optional yellow felt for a star, matching thread, a needle, scissors, narrow ribbon, and the author’s templates. Sequins, beads, ricrac, or embroidery thread are optional decorations, as shown.
Safety note: Buttons, beads, and sequins are small parts. Keep decorated trees away from toddlers, and do not treat them as toys.
7. Felt Candy Cane Ornaments
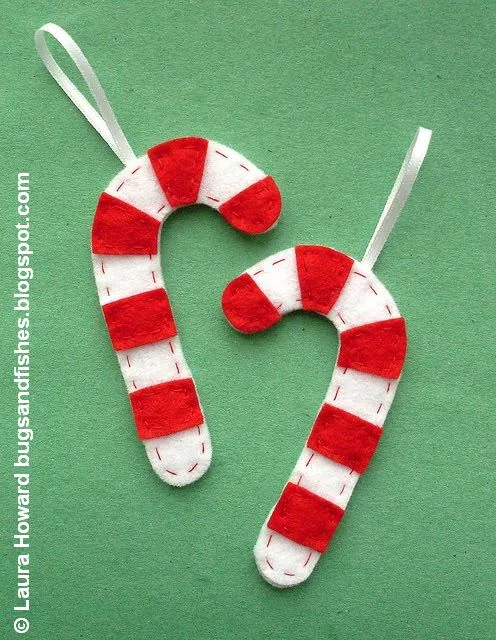
Tutorial: Lupin, Bugs and Fishes
A felt candy cane is a hooked silhouette with red stripe pieces stitched onto a white base, then joined to a second white layer. The photo shows two finished canes, their running stitch and ribbon loops clearly visible. Like Lupin’s other felt tutorials, this one is for personal use; the template stays on the original post and is not copied here.
Method: Hand sewing.
What you need: White felt, red felt, red sewing thread, a needle, pins, scissors, narrow ribbon, and the author’s template sheet.
Display tip: Hang a pair together, or slip one onto a wrapped package as a small extra. They read clearly on a green tree, as the photo suggests.
8. Fabric Bauble and Finial Ornaments
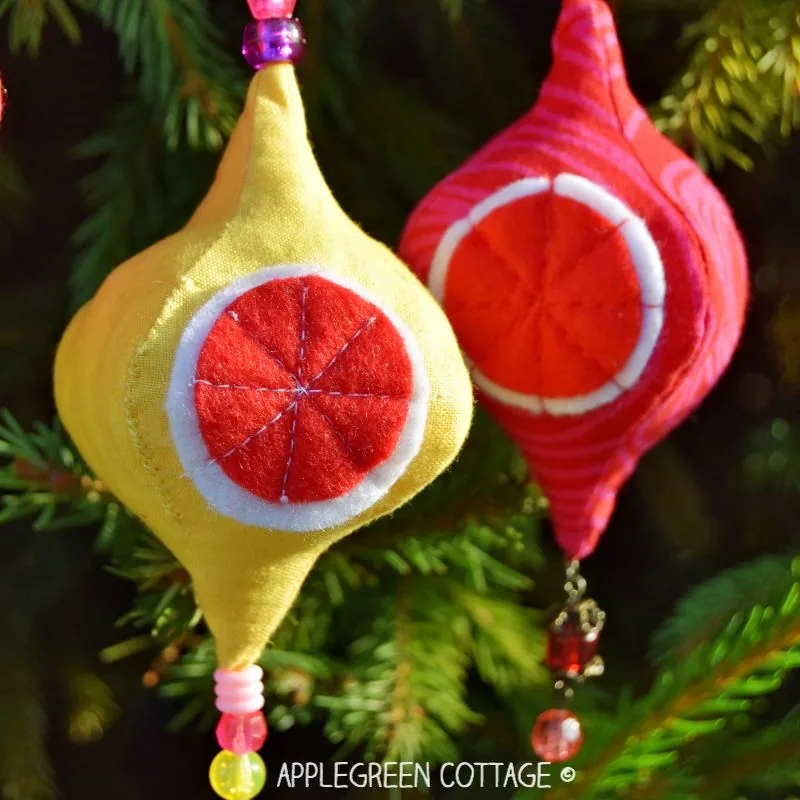
Tutorial: Damjana, AppleGreen Cottage
These are sewn, stuffed fabric baubles and pointed finials, built from patterned scrap fabric rather than flat felt. In the photo, a yellow finial and a red one hang on a tree, each with a stitched felt circle on the front and beads at the tip. Damjana’s tutorial sews four fabric pieces into a 3-D shape, turns it, and fills it with polyfill.
Method: Machine sewing.
What you need: Scrap fabric in contrasting prints, optional felt for the circle accents, polyfill, thread, a sewing machine, scissors, an iron, and embroidery thread or twine for hanging. Beads are optional, as shown. A free template is offered on the original post; use it there, and do not copy or rehost the pattern file.
Safety note: Beads are small parts. Clip curved seam allowances carefully and keep fingers clear of the machine needle. If you press the fabric or felt, follow the temperature on the fabric or felt label, use a pressing cloth so the fibers do not melt, and keep the iron in adult hands when children are helping.
9. Felt Christmas Light Ornaments
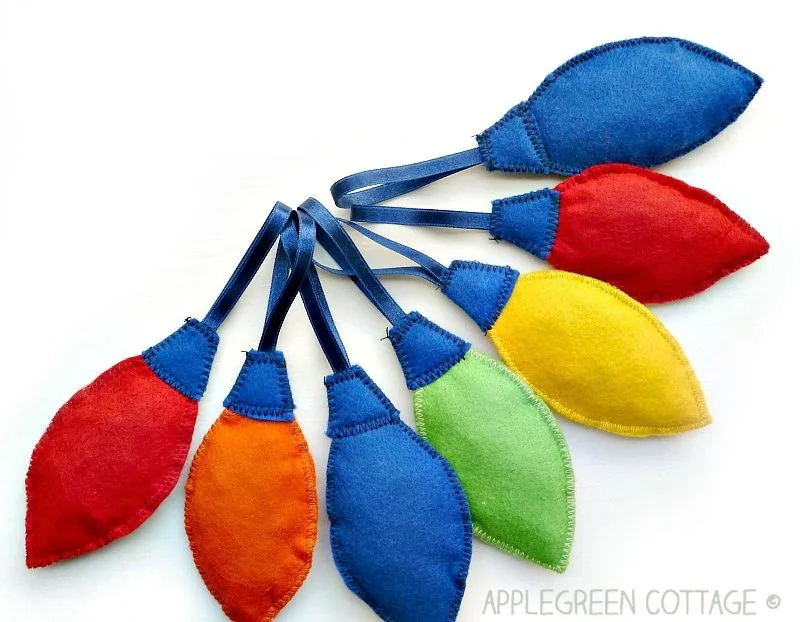
Tutorial: Damjana, AppleGreen Cottage
These ornaments are stuffed felt light-bulb shapes, not glass and not the fabric finials above. The photo shows six finished lights in red, orange, blue, green, and yellow, each with a blue felt cap and a satin ribbon loop. Damjana sews the two bulb pieces with a wide zigzag, stuffs them, and finishes the cap with a third felt piece and a folded ribbon.
Method: Machine sewing.
What you need: Felt in several colors, about eight inches of satin ribbon per ornament, soft stuffing, thread, pins, and a sewing machine or a needle. A free template is on the original post; use it there, and do not copy or rehost the file.
Display tip: Hang them as a mixed string along one branch, or scatter single bulbs among the other felt and fabric Christmas ornaments so they read as lights, not as a flat bouquet.
10. Needle-Felted Acorn Ornaments
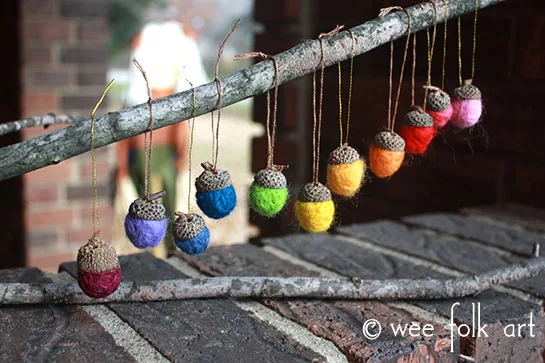
Tutorial: Wee Folk Art
These acorns are needle-felted wool bodies fitted into real acorn caps, not sewn felt and not the stuffed fabric baubles above. In the photo, a row of finished acorns in mixed colors hangs from a branch on thin cords. The Wee Folk Art tutorial felts a wool ball with a barbed needle, then seats it in a cap that has been drilled for a hanging thread.
Method: Needle felting.
What you need: Wool roving, needle-felting needles and a mat, acorn caps, craft glue, scissors, and thread. A small drill is used to make two holes in each cap for the hanging loop.
Safety note: Felting needles are sharp, barbed, and can snap; this is not a child’s craft. Drilling the caps is an adult step. Finished acorns have small parts and are not toys.
11. Felt Tomte, or Gnome, Ornaments
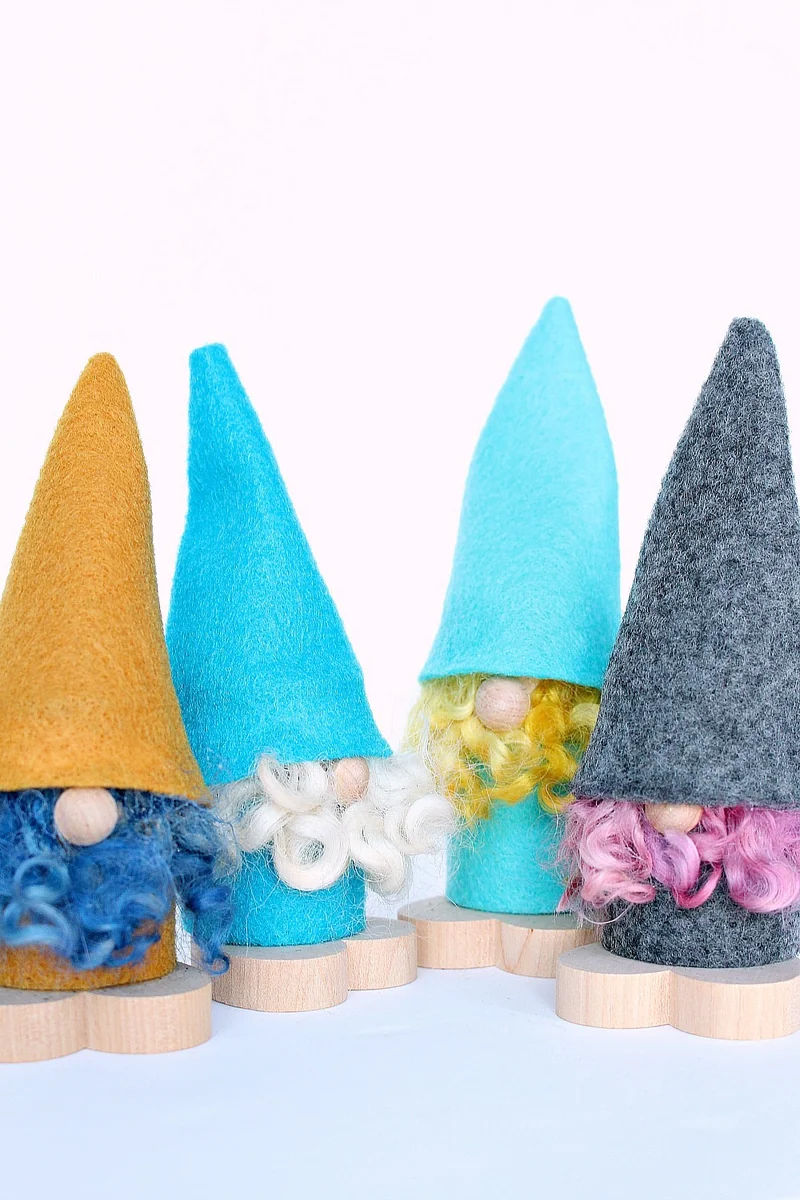
Tutorial: Tanya, Dans le Lakehouse
A tomte, or gnome, is a felt figure with a tall hat and a hidden face, not a flat felt cutout. Tanya’s Dans le Lakehouse tutorial builds a small hanging ornament from felt, a wood dowel or similar core, and glue, with some hand sewing for the felt parts. Follow her original post for the assembly; a saw or heavy snips may be needed if you cut the dowel yourself.
Wool felt holds the tall hat shape better than a thin acrylic. Wood offcuts or a short dowel can give the body a little weight, but they are small parts, and a saw belongs in adult hands. Hang the tomte near the middle of the tree, where the hat can be seen in profile, and do not present it as a toy.
Method: Hand sewing and glue.
What you need: Felt, a short wood dowel or similar core, wool or yarn for a beard, wood for the nose and feet, glue, thread, and a needle. Cutting the dowel may require a saw or heavy snips.
Safety note: A saw or snips is an adult step. Small wood parts are a choking hazard. This is not a toy.
12. Stuffed Felt Star Ornaments
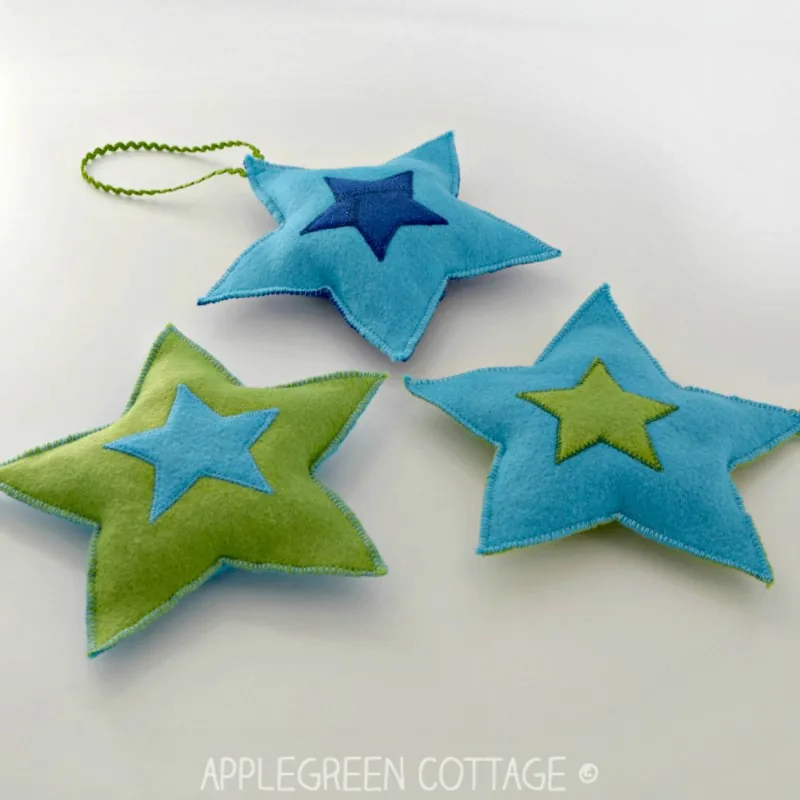
Tutorial: Damjana, AppleGreen Cottage
These stars are two felt star shapes sewn together and lightly stuffed, with a smaller star appliquéd on the front. The photo shows three finished ornaments in blue and green, their zigzag edges and hanging loop clearly visible. They are a padded felt star, not the accordion ball and not the fabric finial earlier in this list.
Method: Machine sewing (a needle can be used instead).
What you need: Felt scraps in two or more colors, about five inches of ribbon per ornament, soft stuffing, thread, pins, and a sewing machine or a needle. A free star template is linked from the original post; use it there, and do not copy or rehost the file.
Display tip: Hang them where the appliqué star can be seen, with a little space around each point so the shape does not collapse against denser ornaments.
Twelve projects is enough to dress a small handmade tree without repeating one felt shape in new colors. Start with a no-sew donut or a stacked disk tree if you want something that does not require a sewing machine, then add a hand-sewn candy cane, a fabric finial, or a needle-felted acorn so the branches have more than one texture.
Each full how-to, including any free pattern or template, lives on the original tutorial linked above. Use those pages for the steps, and keep buttons, beads, glue guns, drills, and felting needles in adult hands.