
A stack of paper can cover more of the house than a last-minute store run, but only if you have more than one structure in mind.
A flat cut snowflake belongs on a window pane. A paper-bag snowflake can hang on a wall with a string of cool lights. A small cardstock house can glow on a mantel, as long as the light stays cool.
These 14 paper Christmas decorations come from original tutorials, each with a different structure or place to display it. Below you’ll find the materials, the key method, and a link back to the full how-to so you can follow the creator’s steps. This list stays on decorations for the home — wrapping, tags, and gift toppers are left for a separate post.
Choose a Paper Weight That Can Hold the Shape
The Paper. Printer paper folds and cuts cleanly for snowflakes and tiny lucky stars. Cardstock is a better choice when a lantern, an eight-point star, or a little house needs to stand. Translucent kite paper glows in a window. Book pages and lighter scrapbook sheets open into ruffled trees and honeycomb volume that heavier paper will not give you.
Decide the Spot Before You Cut
The Display. Windows and walls can take lightweight hanging pieces on thread or fishing line. The tree wants a smaller ornament with a secure loop, or a star that can sit on a skewer as a topper. Doors and tables need a backing or a flat base so the decoration does not twist or tip.
Keep the Colors Consistent
The Palette. A limited mix — cream and green, red and kraft, or pages from an old book — helps a batch of handmade pieces look intentional when they share a room. Bright scrap paper works just as well if that is the look you want.
Use Cool LEDs, Never a Flame
The Light. Paper decorations and heat do not mix. If a house, lantern, or hanging snowflake is meant to glow, the original tutorials call for battery LED tea lights, micro LED string lights, or another cool bulb. Keep every paper piece away from candles, fireplaces, heaters, and hot incandescent bulbs, and do not leave lights on unattended.
1. Folded-and-Cut Paper Snowflakes
Tutorial: Ananda, A Piece of Rainbow
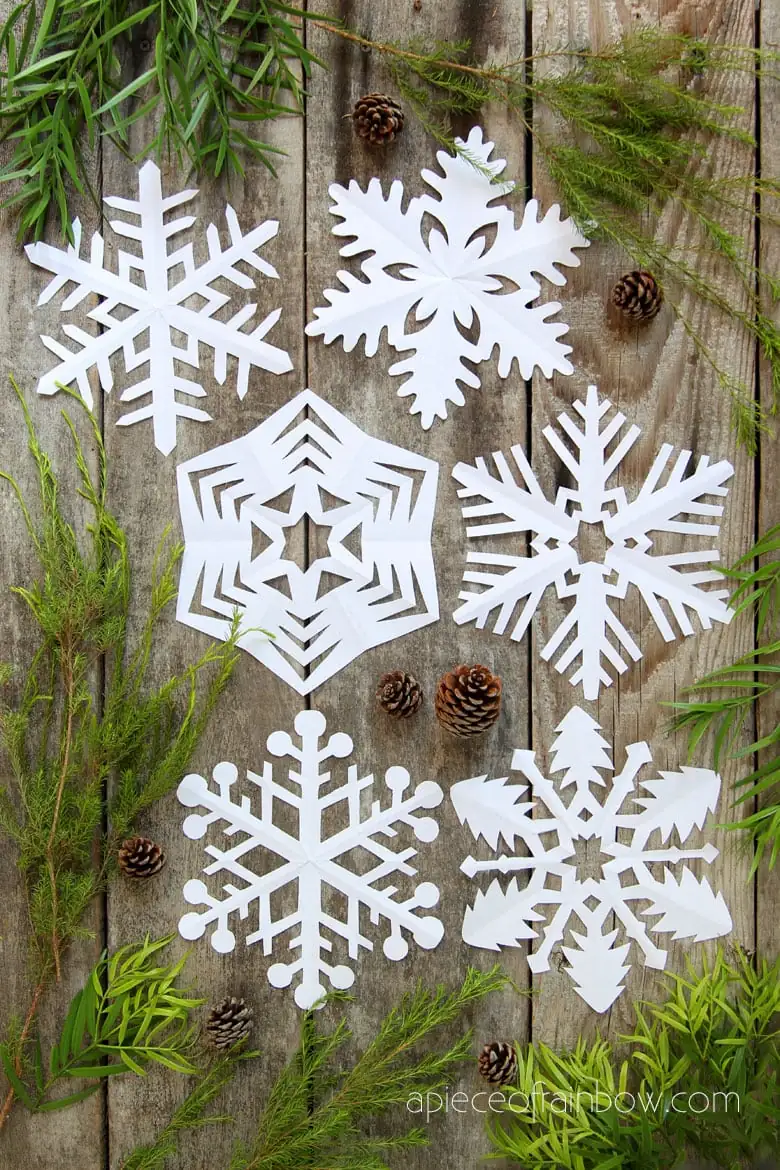
Ananda’s tutorial is for classic six-point cut snowflakes — the same geometry as a real snowflake — cut from squares of everyday paper. The photo shows a set of finished flakes in different patterns, from simple branched arms to a hexagonal design with a star at the center, laid out on wood with greenery.
What you need: Regular 8.5 x 11 copy paper or other lightweight colored paper, scissors, and optionally a pencil for sketching the cut before you commit. The tutorial notes that cardstock is usually too thick once the square is folded into layers.
Display tip: Tape them to a window, hang them from thread in a doorway, or scatter a few across a table runner. Use the creator’s templates only from the original post; they are not reproduced here.
These easy paper Christmas decorations are a good starting project if you want something you can put up the same afternoon, especially with kids and a pair of scissors under supervision.
2. Giant Paper-Bag Snowflake Pendants
Tutorial: Ananda, A Piece of Rainbow
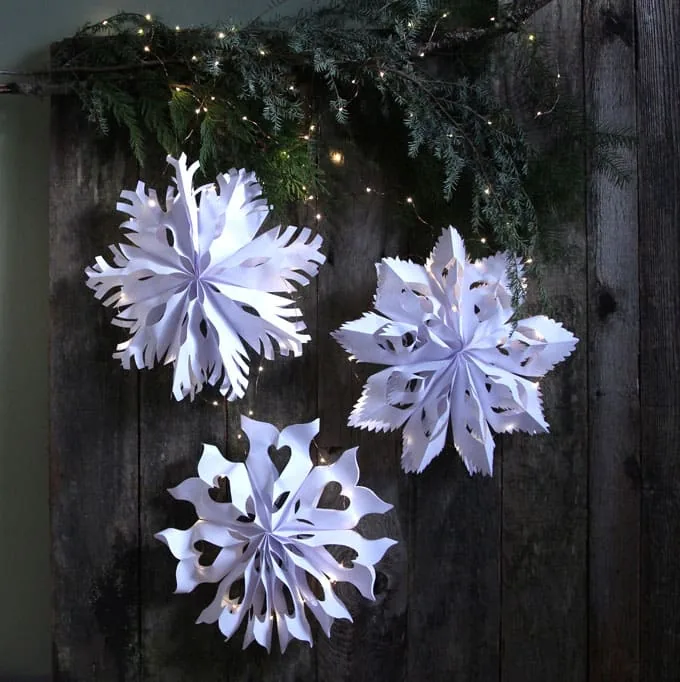
These are not flat flakes. Ananda stacks and cuts paper bags — or bags folded from office paper — so they open into large, ruffled pendants. In the photo, three finished snowflakes hang on dark wood, with cool string lights tucked through the layers and a swag of evergreen above.
What you need: White paper bags or 8.5 x 11 office paper folded into bags, scissors, and, if you want them to glow, LED string lights. The tutorial also uses clear fishing line for hanging and white paper clips as a helper while the shape is assembled.
Safety note: Use only cool LED string lights, never incandescent or candlelight, and do not leave the lights on unattended.
Display tip: Hang a cluster on a wall, from a mantel, or in a window where the cut edges can throw shadows. Full cutting designs stay on the original tutorial.
3. Accordion-Fold 3D Paper Star Topper
Tutorial: Ananda, A Piece of Rainbow
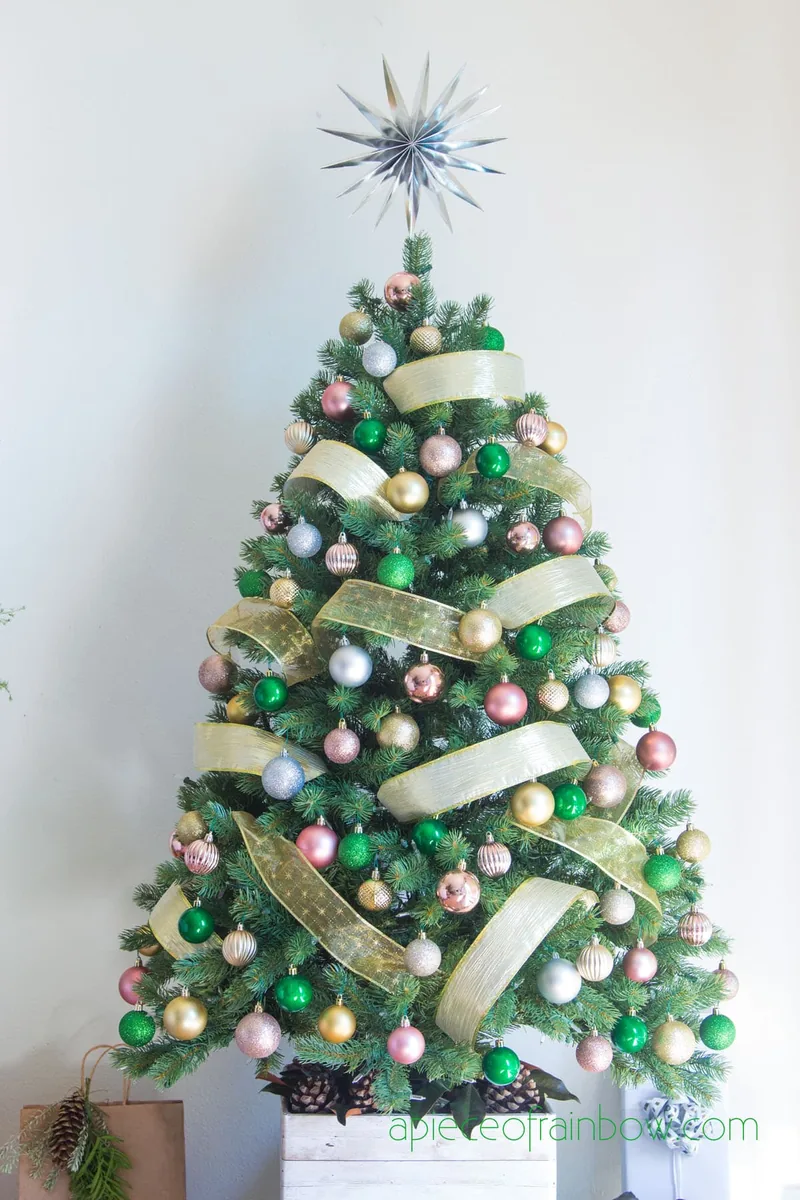
This star starts as an accordion fold, like a paper fan, then gets a pointed cut and is opened and glued into a full 3D burst. In the photo, a silver version sits as a tree topper on a ribbon-wrapped tree — one of the display options in Ananda’s tutorial, along with hanging the same star as wall decor.
What you need: A sheet of 8.5 x 11 office paper or lightweight cardstock, scissors, and craft glue. Metallic cardstock or a later coat of spray paint will change the finish. For a topper, the tutorial adds a long bamboo skewer, attached with hot glue.
Safety note: If you use a hot glue gun for the skewer, keep fingers clear of the tip and the fresh glue; both can burn. Spray paint only in a well-ventilated area, away from open flames, and let the star dry fully before it goes on the tree.
4. Two-Square Eight-Point Paper Stars
Tutorial: Damjana, AppleGreen Cottage
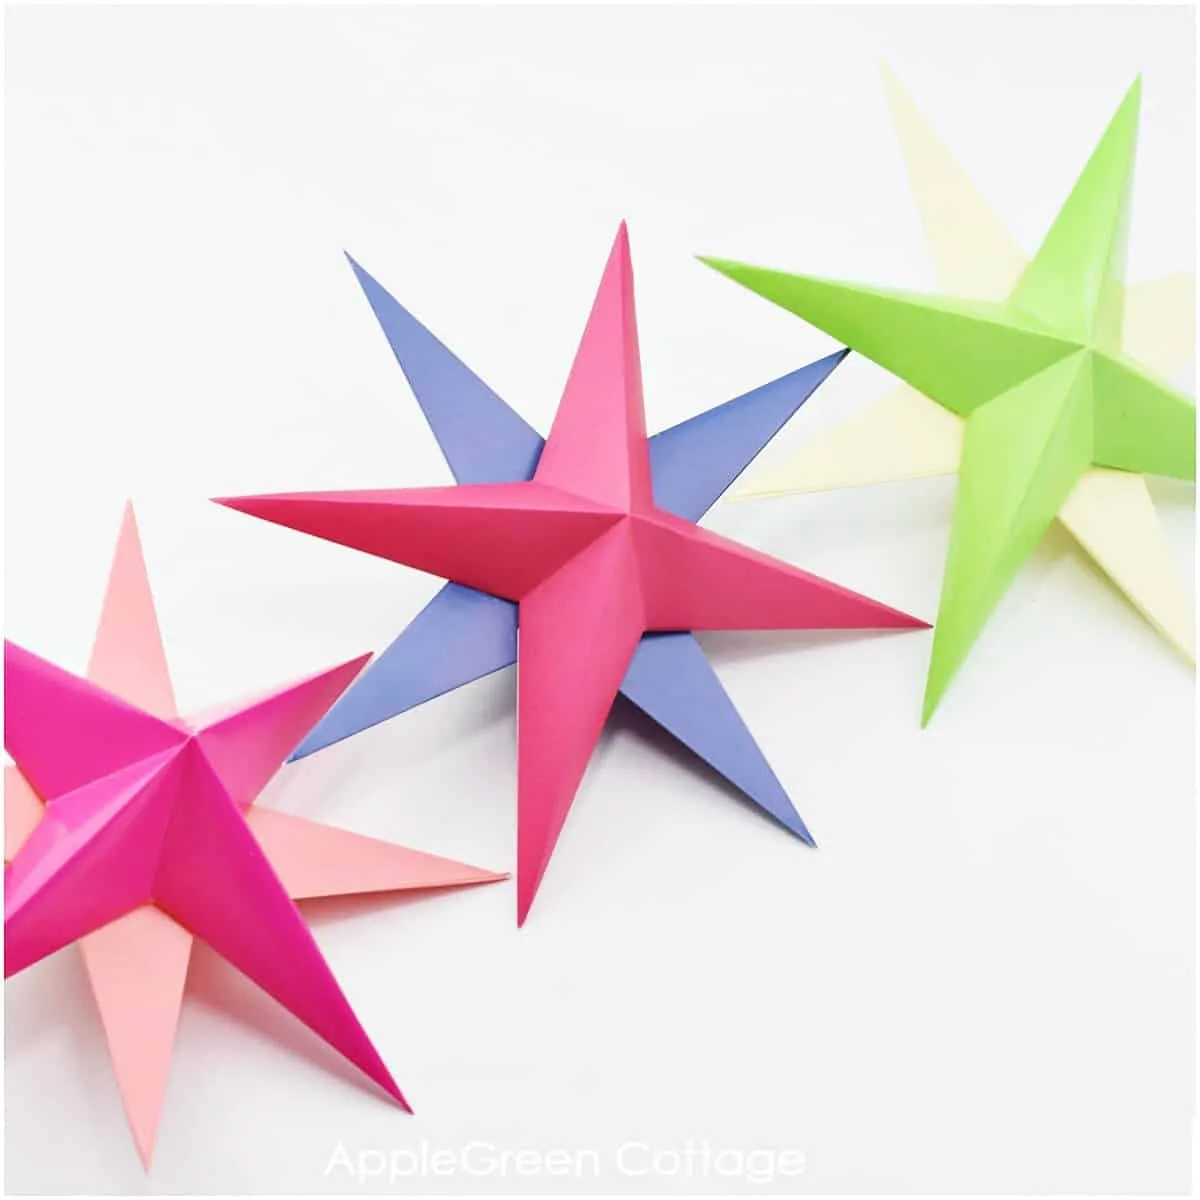
Damjana’s stars are a different structure from the accordion topper: two paper squares are folded, cut, and joined into a sharp eight-point 3D star. The finished photo shows a row of them in bright pink, blue, lime, and pale yellow — a clean, graphic shape that reads clearly from across a room.
What you need: Two square pieces of paper or cardstock (she cuts 6 1/2-inch / 16.5 cm squares in the tutorial) and glue. A heavier sheet holds the points better than very thin paper.
Display tip: Hang them as paper Christmas decorations above a table, in a window, or along a garland; the same stars also work for a New Year or party backdrop if you change the colors.
5. Kite Paper Window Stars
Tutorial: Wee Folk Art
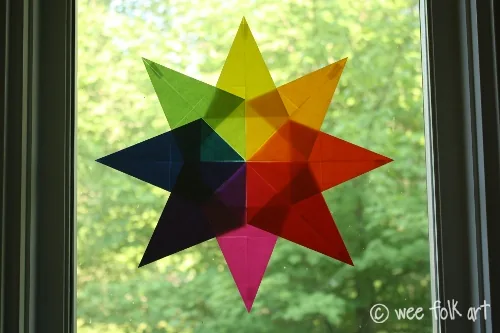
Wee Folk Art’s basic window star is folded from eight squares of translucent kite paper and glued into an eight-point design that catches daylight. The photo shows a finished rainbow star on a window, with the trees outside visible through the colored points — that glow is the reason kite paper is used instead of ordinary construction paper.
What you need: Eight squares of kite paper and clear-drying craft glue. The tutorial walks through a simple Waldorf-style fold, not a cut snowflake and not the more advanced patterns in a window-star book.
Display tip: Press the finished star to a clean window with a small piece of clear tape at a point or two. These are for glass, not for a tree, where the thin paper would not show its color in the same way.
6. Origami Lucky Stars
Tutorial: Wee Folk Art
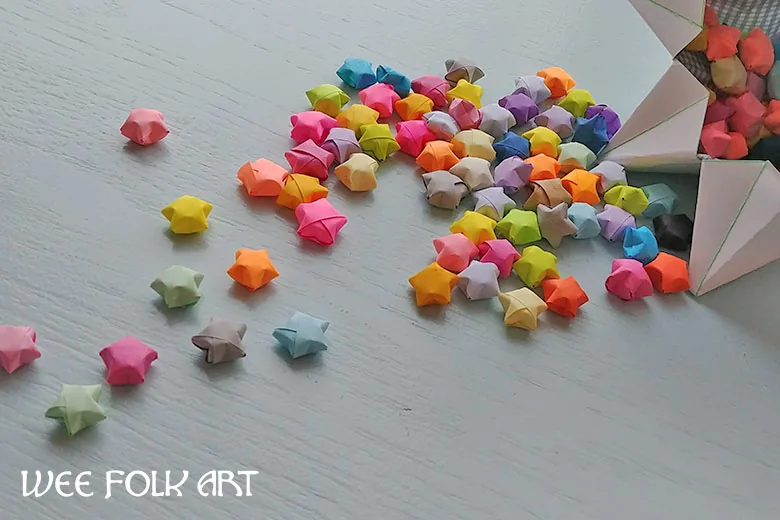
Lucky stars are tiny puffy origami stars folded from a narrow paper strip, not cut snowflakes and not the large eight-point stars above. Wee Folk Art’s finished photo shows a whole handful in mixed colors spilling from a paper cone — enough to fill a bowl or scatter down a table.
What you need: Paper strips about 3/8 to 3/4 inch wide and 9 to 12 inches long, either cut from scrap paper or sold as ready-made lucky-star strips. Scissors are optional if you are cutting your own.
Make it yours: The tutorial notes you can write a short wish or blessing on the strip before you fold. Pile the stars in a bowl, tuck them into a clear ornament, or add a loop if you want a few on the tree.
7. Paper Petal Bauble Ornaments

Tutorial: Ananda, A Piece of Rainbow
These baubles are built from paper petal segments glued into a rounded ornament, with a small bead and hanging string at the top. The photo shows finished balls in stripes, florals, and color-block patterns — some hanging from pine, some resting on books, and one held in a hand so you can see the joined petals.
What you need: Cardstock sturdy enough to hold the curve (Ananda uses a mid-weight craft card stock), scissors, glue, hanging string or twine, and a small bead for the cap. The original post includes free printable designs; use them from that page rather than copying the templates here.
Display tip: Hang them on the tree, along a garland, or in a cluster from a branch in a vase, as in the photo. This is a good handmade paper Christmas ornament when you want color and pattern, not a single white flake.
8. Honeycomb Paper Ornaments
Tutorial: First Day of Home
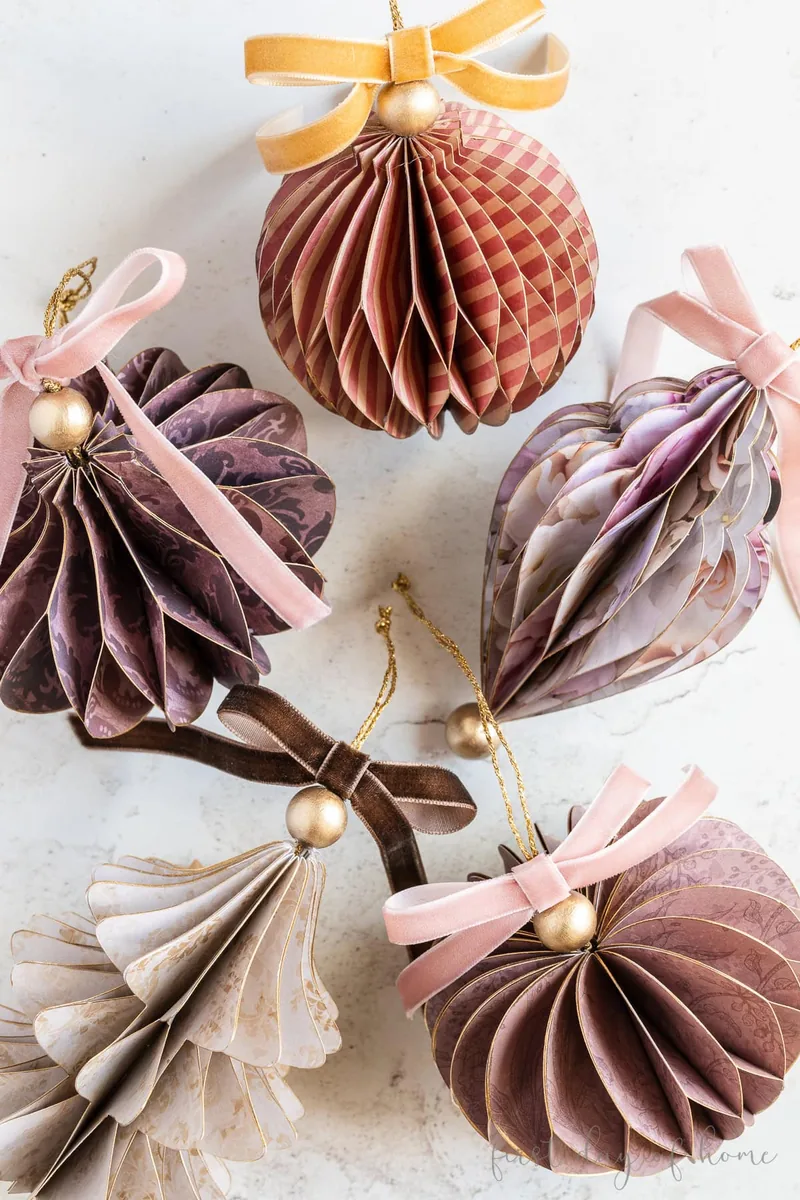
First Day of Home’s ornaments are stacked, folded paper pieces that open into a honeycomb, then finish with a velvet bow and a gold bead. The photo shows five completed shapes — a round ball, a heart, a bulb, a tree, and another gathered sphere — in muted rose, plum, and cream patterned papers.
What you need: Paper (the tutorial mentions school glue, paper, and string as the basic set; scrapbook paper, tissue, cardstock, wrapping paper, book pages, or rice paper can all be used), glue, and hanging string. Velvet ribbon and wood or gold-tone beads are optional finishes shown on the completed ornaments.
Display tip: Hang them on the tree or group a few in a bowl. The original post offers a free template for the round ornament; other shapes are part of a paid bundle on that site, and neither file is reproduced here.
9. Paper Fan Angels
Tutorial: Wee Folk Art
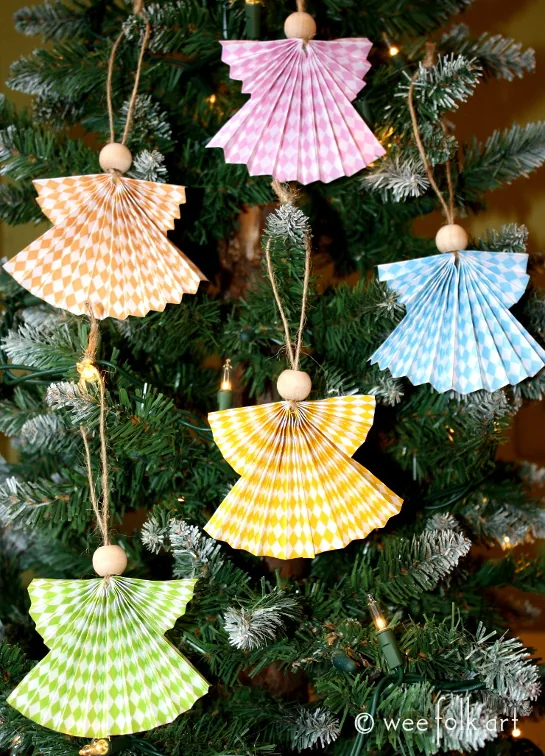
Each angel is a small paper fan folded into a dress and wings, with a wooden bead for the head and a twine hanger. In the photo, five finished angels in pink, orange, yellow, blue, and green diamond paper hang among the branches of a lit tree.
What you need: Thin paper (the tutorial advises against construction paper or cardstock for these small angels), a small bead, twine, and glue. Magazine pages and leftover patterned scraps are suggested as stand-ins if you do not have craft paper on hand.
Display tip: Hang them on the tree, as shown, or tuck a single angel onto a wrapped package as a tag. Keep the paper thin so the fan folds stay sharp.
10. Paper Poinsettia Wreath
Tutorial: Wee Folk Art
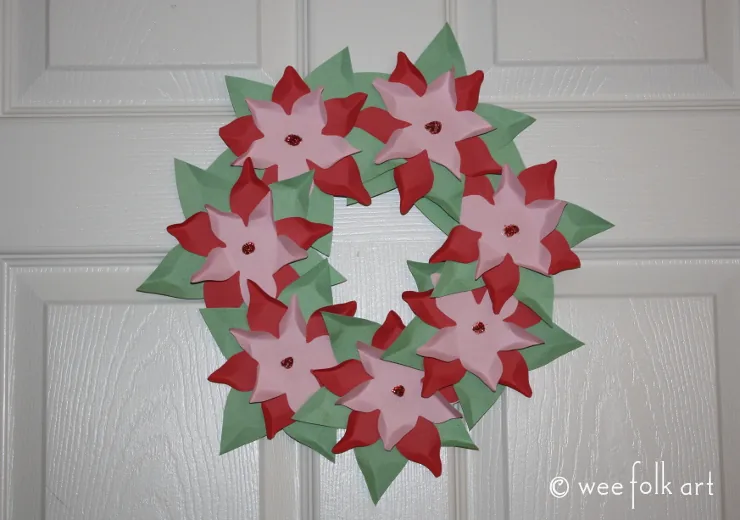
This is a door or wall wreath, not a tree ornament: layered red and pink paper poinsettias with green leaves, mounted on a recycled cardboard ring. The finished photo shows the wreath hanging on a white paneled door, with a small glittered center on each flower.
What you need: Red, pink, and green construction paper, a used cardboard box for the ring, a glue stick or craft glue, scissors, a ruler, a pencil, and the pattern from the original tutorial (not copied here). Wee Folk Art notes that a child who can hold scissors can help cut, and younger children can help with gluing.
Display tip: Hang it on an interior door or a wall hook. It is a lightweight paper wreath, so keep it out of rain and away from a hot porch light.
11. Stacked Ruffled Paper Christmas Trees
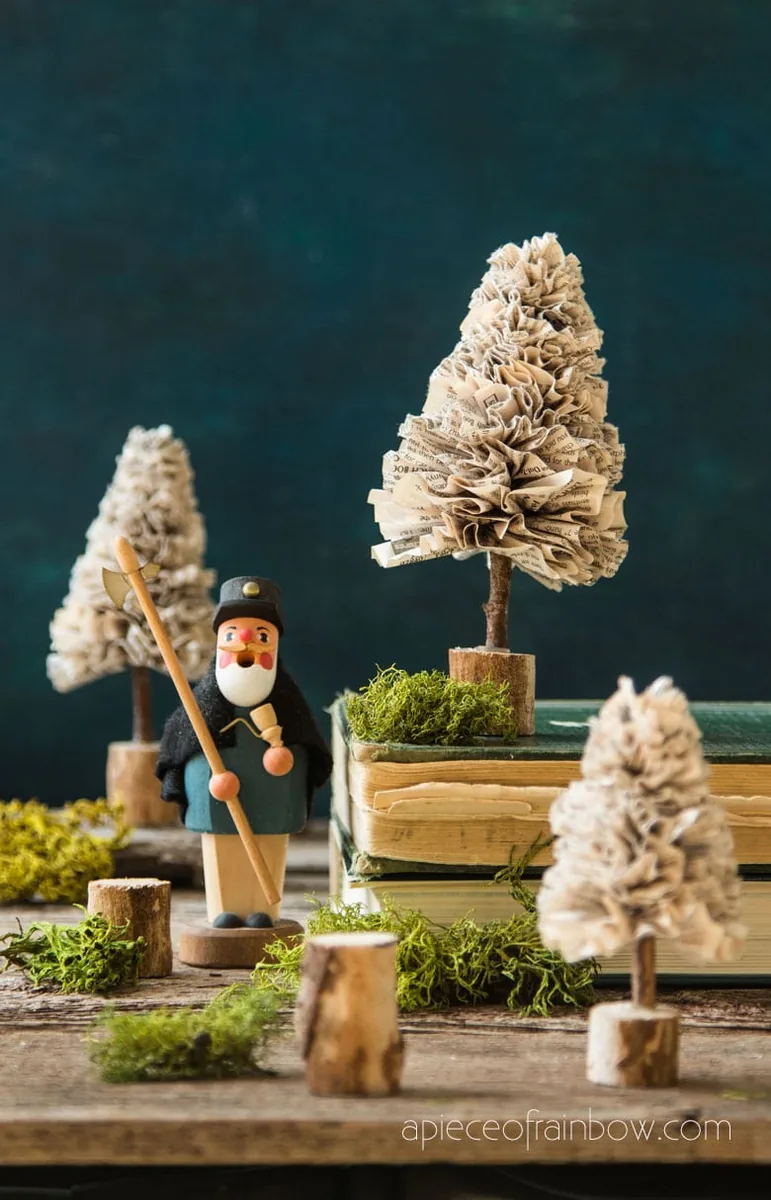
Tutorial: Ananda, A Piece of Rainbow
Ananda builds these little trees from accordion-folded paper strips that are glued into ruffled discs, stacked, and trimmed into a cone, then set on a twig trunk and a wood-slice base. The photo shows a group of finished trees in printed book pages, with moss and wood discs around them on a table — a small winter village scene rather than a hanging ornament.
What you need: Paper such as recycled book pages, newspaper, magazines, or scrapbook paper; small twigs and wood slices for the trunk and base; scissors; and glue. The tutorial uses craft glue for the rosettes and a hot glue gun to attach the trunk and base.
Safety note: If you cut your own wood slices, use appropriate tools with care. A hot glue gun can burn; keep fingers clear of the tip and the fresh glue. These trees are tabletop decorations, not lights — do not add a candle.
Display tip: Group a few on a mantel, a bookshelf, or a tablescape with the house luminaries later in this list if you want a small paper village.
12. Watercolor Folded Paper Star Lantern
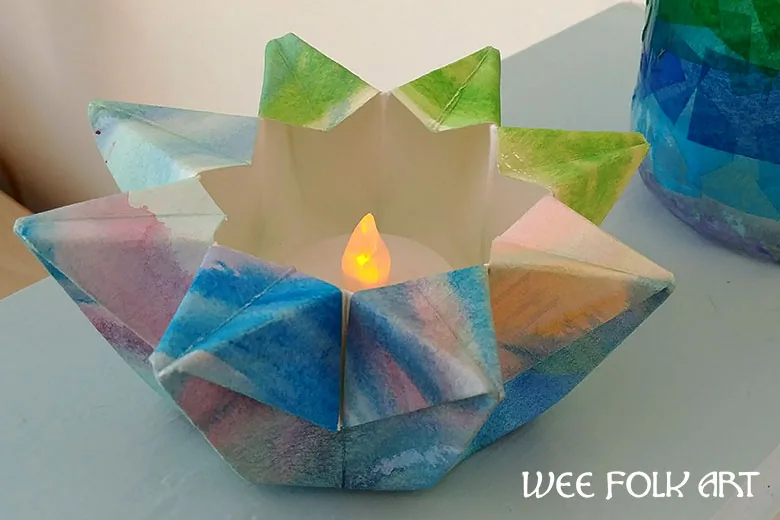
Tutorial: Wee Folk Art
This Waldorf-style lantern is a single square of paper folded into a star-shaped bowl that sits around a light, not a hanging polyhedron. Wee Folk Art’s photo shows a finished lantern painted in watercolor blues, greens, and pinks, with a battery tea light glowing in the center.
What you need: Thick paper — scrapbook paper or a watercolor painting — large enough to cut an 8- to 12-inch square, scissors, and a battery-operated tea light. The tutorial is written so leftover children’s paintings can be reused.
Safety note: Use only a battery LED tea light inside the paper. Never set a wax candle or other open flame in or near it.
Display tip: Set one or two on a side table or a windowsill, away from drapes and out of reach of very young children who might pull at the light.
13. Punched Paper Star Lantern
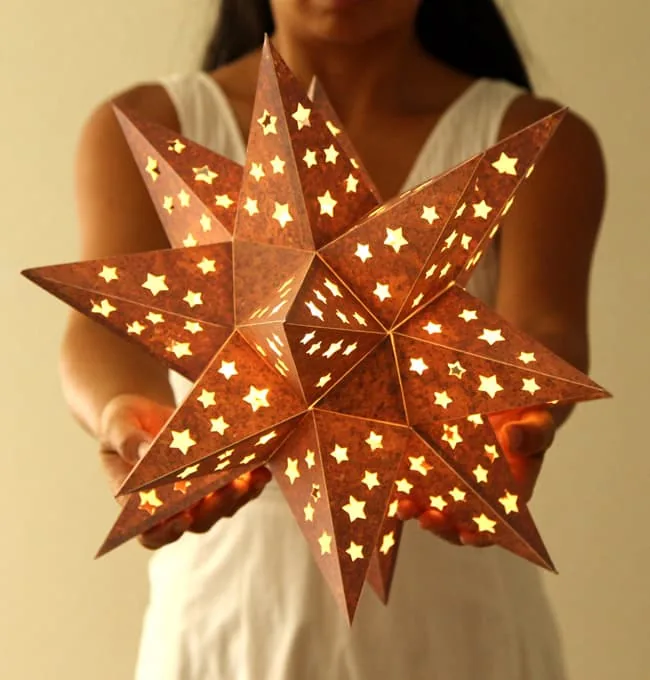
Tutorial: Ananda, A Piece of Rainbow
Ananda’s star lantern is a different form from the folded bowl above: a faceted, pointed paper star assembled from cardstock pieces, with star-shaped openings punched or cut so the light shows through. The finished lantern in the photo has a rusted-metal look and is held in two hands, glowing from the LED lights inside.
What you need: Sturdy index-weight cardstock (the tutorial mentions about 110 lb index stock), a craft knife or a cutting machine, glue, and micro LED string lights. A star punch can cut the openings if you are working by hand. A hanging cord or fishing line is optional. Use the free template from the original post; it is not rehosted here.
Safety note: Use only good-quality LED lights near paper, follow basic electrical safety, and do not leave the lantern on unattended. This is not a candle lantern.
Display tip: Hang it on a covered porch or set it on a table where the punched stars can throw light on the wall.
14. Cardstock House Luminaries for a Mini Village
Tutorial: Ananda, A Piece of Rainbow
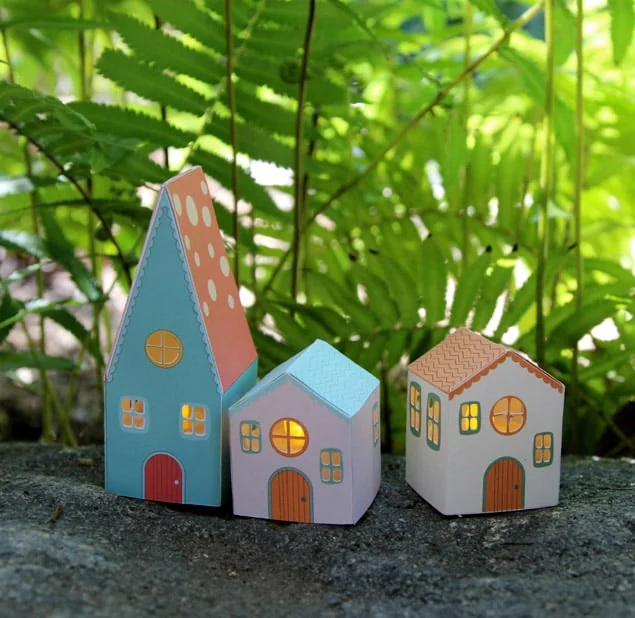
Ananda’s little houses are open-bottom cardstock luminaries, meant to sit over a light rather than hang. The original post includes free house patterns, reached through the download area described on that page. Print them on cardstock — she notes a sturdy index-weight sheet, about 215 gsm, as a favorite — cut the outline and window openings with a craft knife, and score the wall and tab folds before you glue the house together.
Leave the bottom open so the house can sit over a battery LED tea light. A single house works on a shelf; a few together make a small village on a mantel. Use a cutting mat, and keep fingers clear of the blade when you cut the windows.
Safety note: Place only battery LED tea lights under the houses. Never use a taper, a wax tea light, or a hot bulb.
Display tip: Line up a short row on a mantel, table, or bookshelf; these are tabletop pieces, not tree ornaments. They sit naturally next to the ruffled paper trees if you are building a small paper village.
Start with the structure that already matches the spot you want to decorate, and follow the original tutorial for the full steps and any printable the author provides.